![logo inverted.png]](https://www.proagenda.com/hs-fs/hubfs/logo%20inverted.png?height=50&name=logo%20inverted.png)
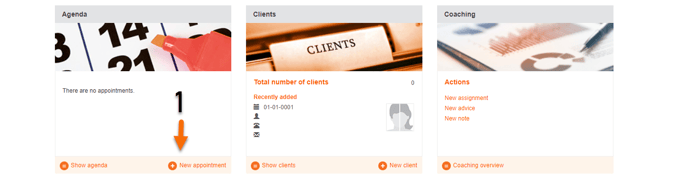
- Click on _new appointment_ or go to agenda and click on a time box (this will be your ending time)
- Click on _appointment type_
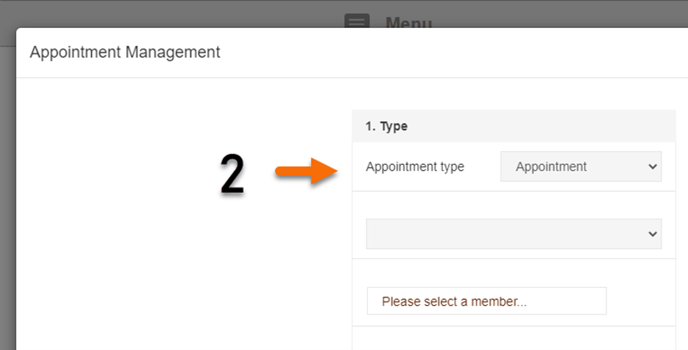
For appointment type: appointment
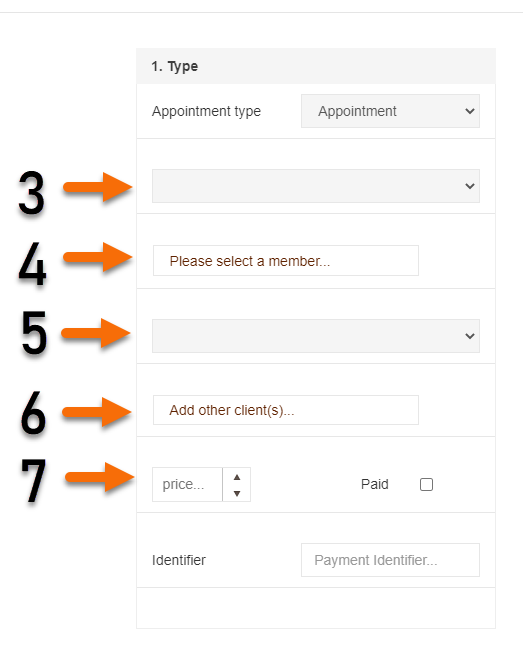
4. Select a client
5. Select one of the options
6. Add other clients if needed
7. Price is set based on appointment type settings but can be overruled if needed
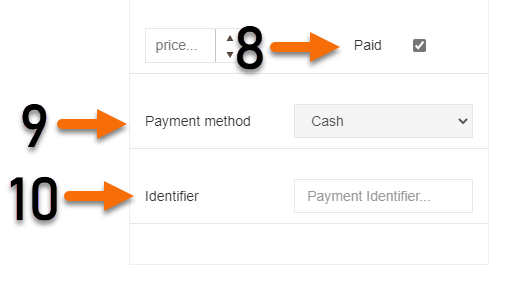
8. Click on _paid_ if the client has paid
9. Select a payment method
10. Fill in a payment identifier (automatically filled with online payment)
11. If a client did not pay, do not click on _paid_
14. Select a starting time
15. Check the ending time, if this is wrong, please click on another timeslot
16. If the appointment is recurrent select the recurrence (daily, weekly, monthly)
17. Select the location of the appointment
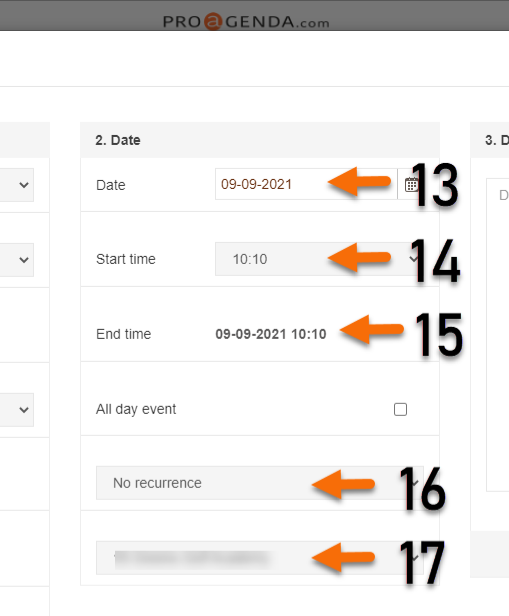
18. If it concerns an all-day event, click on _all day event_
19. Add any important details
20. Click on _Save_
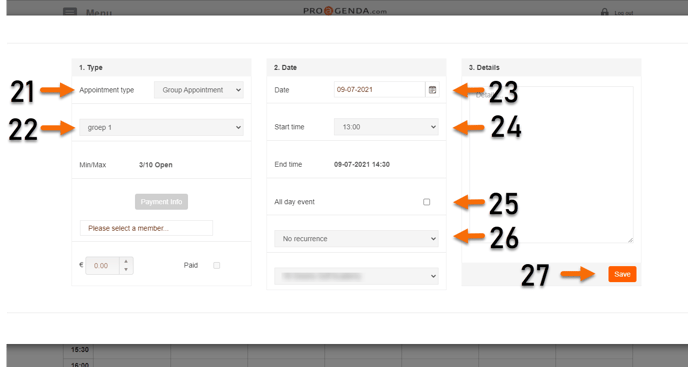
For appointment type: Group appointment
21. Select _ group appointment_
22. Select one of the group appointments. All the details will automatically be transferred
23. Check the date24. Select a starting time
25. Click _all day event_ if it concerns a full day activity
26. If the appointment is recurrent select the recurrence (daily, weekly, monthly)
27. Click on _Save_
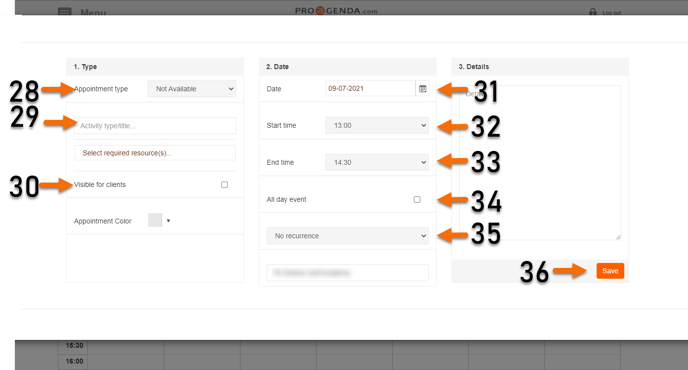
For appointment type: Not available
29. Fill in the activity title
30. Check the box if you want the activity visible for clients
31. Check the date
32. Select a starting time
33. Select an ending time
34. If it concerns an all-day event, click on _all day event_
35. If the appointment is recurrent select the recurrence (daily, weekly, monthly)
36. Click on _ Save_
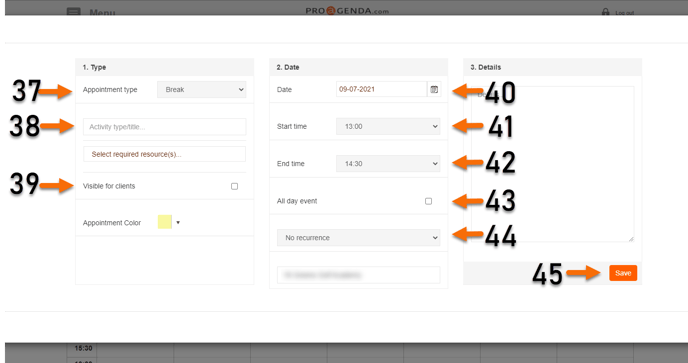
For appointment type: break
38. Fill in the activity title
39. Check the box if you want the activity visible for clients
40. Check the date
41. Select a starting time
42. Select an ending time
43. If it concerns an all-day event, click on _all day event_
44. If the appointment is recurrent select the recurrence (daily, weekly, monthly)
45. Click on _Save_
For appointment type: availability
46. Select _availability_
47. Check the date
48. Select a starting time
49. Select an ending time
50. Click _Save_
