![logo inverted.png]](https://www.proagenda.com/hs-fs/hubfs/logo%20inverted.png?height=50&name=logo%20inverted.png)
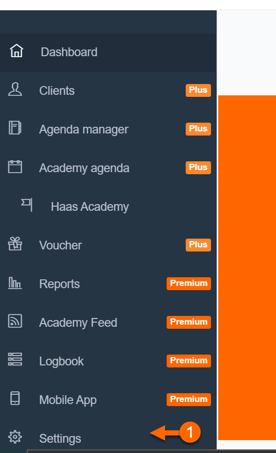
1. Go to your dashboard
2. Click on _Settings_
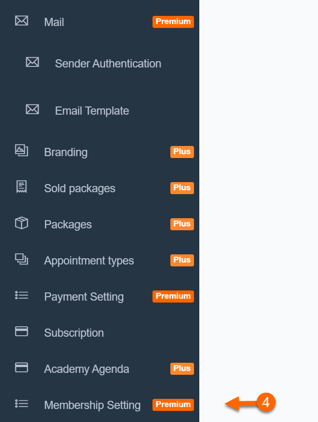
3. Scroll down
4. Click on _Memberships_
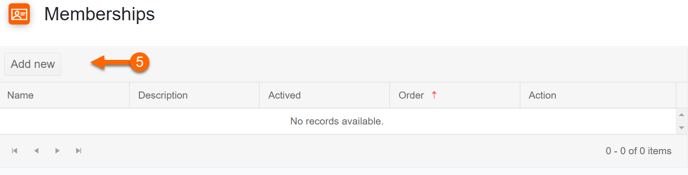
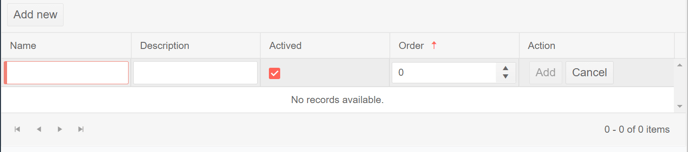
6. Click on _Add new_
9. Go back to settings
10. Scroll down
11. Click on _Appointment types_
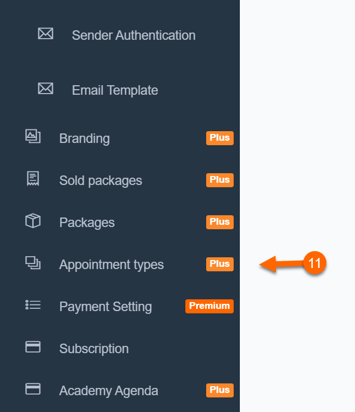
Note: You will have to follow these steps with every individual appointment type. This example will show a 60 min appointment type, but these steps can be applied to all appointment types or packages
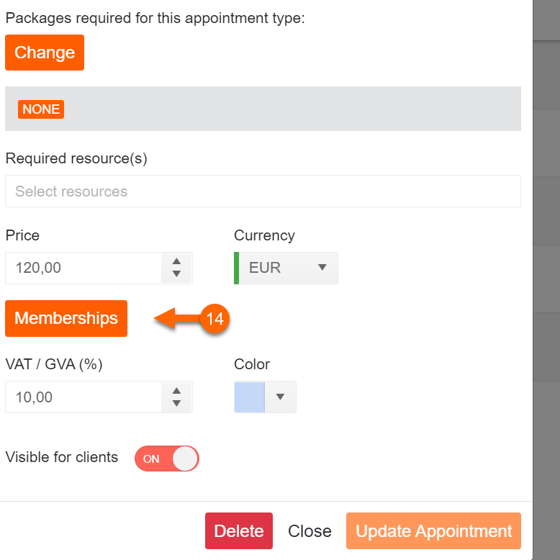
13. The pop-up screen for this appointment type will now show, scroll down
14. Click on _Memberships_
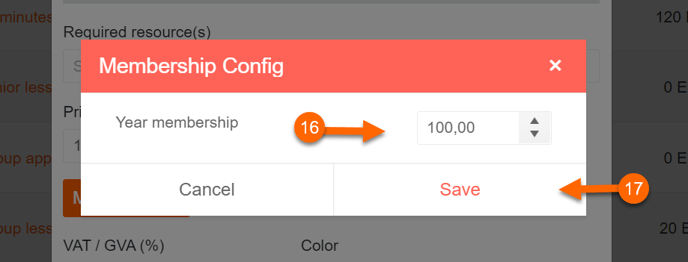
16. Decide the price for all the different memberships (the example will only show one membership)
17. Click on _Save_
18. Do this for all the appointment types with membership prices.
Note: The prizes will be saved when you press the save button for the membership prizes. You can’t, and don’t have to, update the appointment type. Just click on _Close_
Assigning memberships
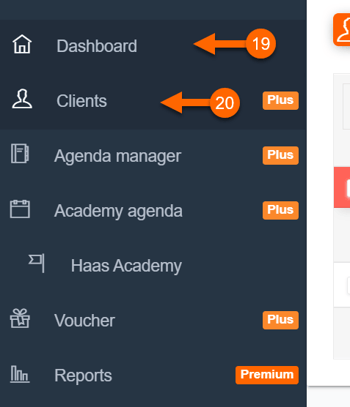
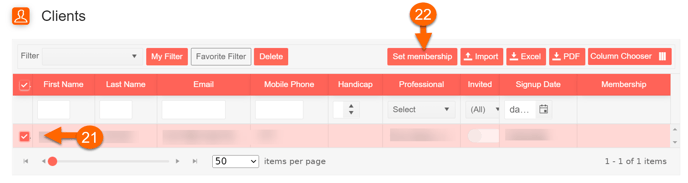
19. Click on _Dashboard_
20. Click on _Client_
22. Click on _Set memberships_
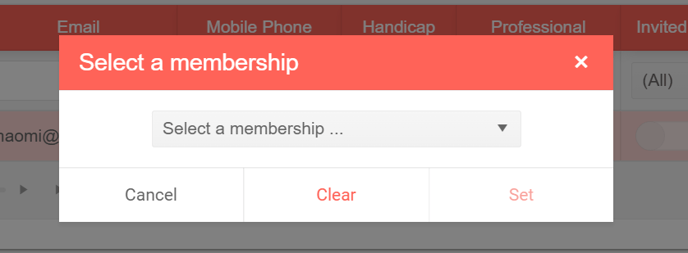
24. Click on _Set_
26. Clients with this membership will now see the prices you have set for this membership