![logo inverted.png]](https://www.proagenda.com/hs-fs/hubfs/logo%20inverted.png?height=50&name=logo%20inverted.png)
Part 1: Setting up peak prices
A note before you start: Peak times can vary between pros and resources. Therefore, different times can be set based on your specific peak times, meaning different peak periods can be created.
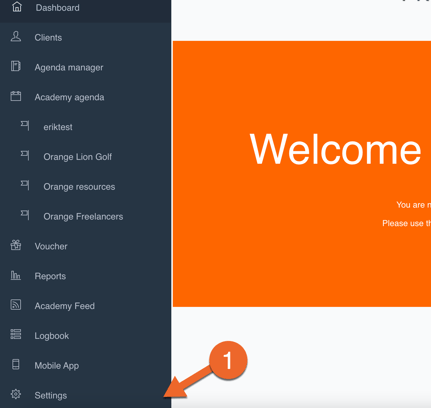
1. Click on _Settings_
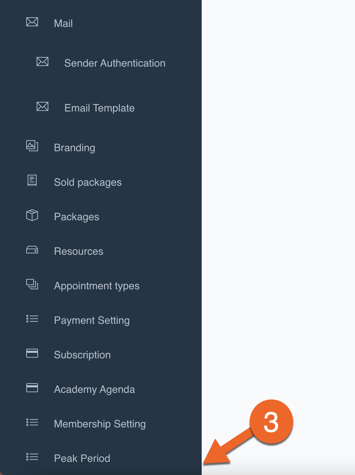
2. Scroll all the way down
3. Click on _Peak Period_
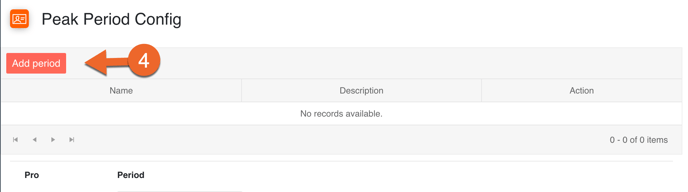
4. Click on _Add Period_
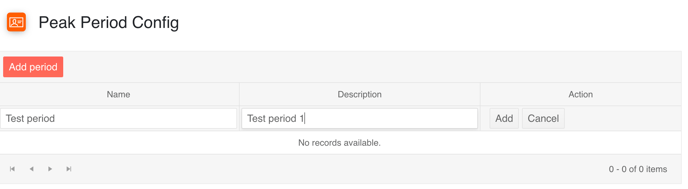
 5. Fill in the name of the period and a clear description and click on _Add_
 6. Fill in the time and period for the peak times
7. Select the period of the peak price
8. Select the days and times the period applies to
9. Click on _Add_

10. Select the peak periods per pro or resource. This way, you can decide which pro or resource will benefit from the different peak prices.
Part 2: Set peak prices in your appointment types
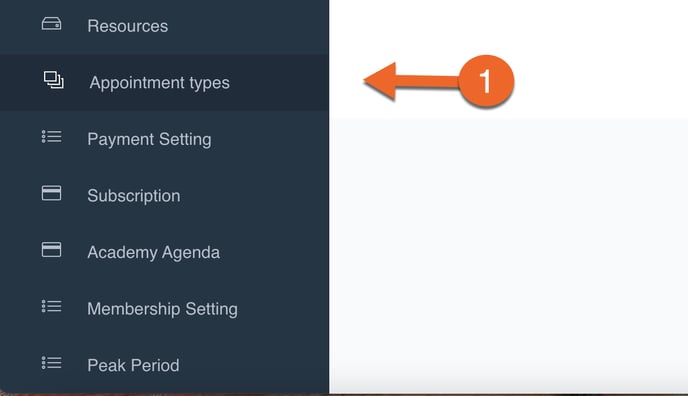
1. Click on _Appointment types_

2. Select an appointment
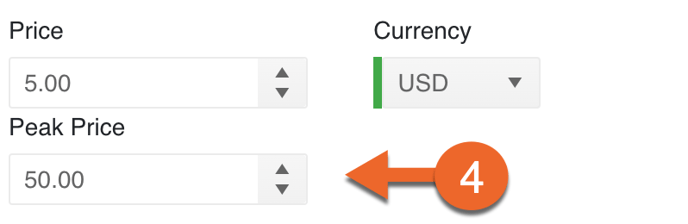
3. Scroll down to the price section
4. Fill in the desired price
 5. Click on _Update appointment_ to save the changes
6. Repeat this process with every appointment if needed
To set peak times for your resources, you can go to Settings > Resources and click on _Settings_ behind the resource of which you would like to set a peak price.
Part 3: Changing prices for memberships
1. Click on _appointment types_ in the settings
2. Select an appointment
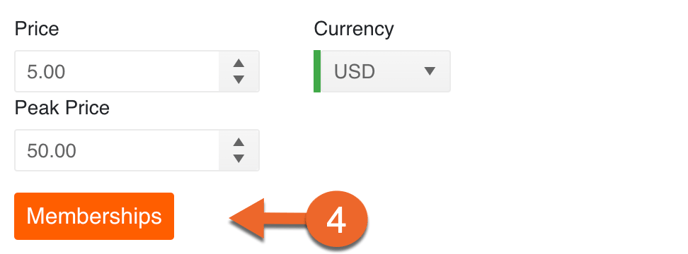
3. scroll down to the price section
4. Click on _Memberships_
5. Fill in the desired price for members
6. Click on _Save_

7. Click on _Update appointment_ to save the changes
8. Repeat this process with every appointment if needed